

How To Clean A Mosin Nagant M44
Introduction
This guide will document the process I used to restore and refinish a Mosin Nagant M91/30 rifle. This is the first Mosin I've restored, so I'g not an expert and I tin't compare all the possible restoration techniques. Your process and results may vary.
Restoration Goals
Before you starting time refinishing, you should decide what you desire your rifle to look similar. A new modern rifle? Like it came off the Russian assembly line seventy years ago? Or only cleaned upwards and set for the range? This will help determine how much time, endeavor and money you'll need to put into the project. Some people consider Mosin Nagants historical artifacts, and pout upon anything more than minimal preservation. Other people consider them onetime, surplus military rifles and despite a lot of historical significance, they're simply a rifle with only one purpose - to blow holes in stuff. I made no endeavour to preserve the historic status of my Mosin.
Expectations
Before I saw the rifle, I had planned to restore information technology to the same status every bit a typical new rifle. Afterwards I saw the rifle, I knew that wasn't going to happen. This rifle looked like it was fabricated in a loftier school metal shop class, and so taken out and beaten with an ugly stick by half the Russian army. There wasn't whatsoever area on the rifle without machining marks, pitting, dings, and all sorts of other imperfections. Information technology may have been possible to remove all the imperfections, simply it would accept far more than time and effort than I was willing to invest. I ultimately decided to spend some time cleaning information technology up and looking presentable on the range, but non perfect. Any remaining imperfection would be considered "grapheme".
Disclaimer
I am not a gunsmith. I am non responsible if you break something or hurt someone.
Cleaning
Cosmoline... Is your rifle covered in information technology? If so, you'll take to remove information technology. You lot can apply either heat or a solvent to remove cosmoline. Everyone has a different method, only I recommend washing information technology off with a solvent, similar mineral spirits. Other people use break cleaner, oven cleaner, steam, boiling water, heat from the sun or various other things. Using mineral spirits is fairly simple, just go go a large tin of mineral spirits, a big plastic tub and a nylon castor. Be certain to exercise this in a well ventilated area with gloves. You'll likely need to detach the bolt to go it clean (see below). Too, exist certain to oil all metal as soon as the solvent has evaporated to prevent rust.
I had a hard time getting my barrel make clean. Y'all don't accept to clean the butt to restore your Mosin, but it'll probably assist to prevent contamination during the bluing process. I suspect the corrosive primers and lack of through cleaning left some pitting in the barrel that increased the surface area and gave the fouling lots of places to accumulate. I don't have any magic tricks to clean the barrel in ten seconds. A bore ophidian seemed to speed upwards the process.
Disassembly
This will be a brief overview of Mosin Nagant M91/30 disassembly. There are many resources online if you demand more detailed directions.
First, inspect the chamber and make sure the rifle is non loaded. Follow all safety rules when disassembling the burglarize. Don't nominate yourself for a Darwin Accolade.
Some people remove the recoil bolts earlier refinishing the stock. Other people (including myself) just work around the bolts. If y'all make up one's mind to remove them, it's easier to practice it before disassembling the rest of the rifle. Employ a pair of snap band pliers to unscrew the bolts. You may need to advisedly tap them out of the stock.
- Make sure the rifle isn't loaded.
- Pull the trigger and slide the bolt back and out of the receiver.
- Remove the cleaning rod (just unscrew it and pull forward).
- Printing the barrel band springs and try to slide off the bands.
- Curse every bit you lot fight with the bands and gouge the stock with a screwdriver trying to pry them forrad. Use a Q-tip with rubbing booze under the springs to assist free them up. Apply a small screwdriver in the ring gaps and gently pry them open a bit.
- Slide the bands forward. Only the larger rear band will fit over the front sight. Merely leave the smaller band on the barrel.
- Remove the acme hand guard.
- (Optional) Remove the mag spring by pushing the latch under the magazine, swing the jump upwardly, squeeze information technology and pull information technology out of the magazine.
- Remove the magazine tang screw (located under the rifle in front of the magazine).
- Remove the receiver tang screw (located on the top of the rifle at the rear of the receiver).
- Slide the magazine / trigger guard associates downward and out of the stock.
- Lift the receiver / barrel up and out of the stock. Be careful not to lose the pin attaching the trigger to the receiver.
- Remove whatever other parts y'all want, similar the barrel plate and the minor cap on the front end of the stock.
I recommend keeping all the screws and modest parts in a nil-loc handbag.
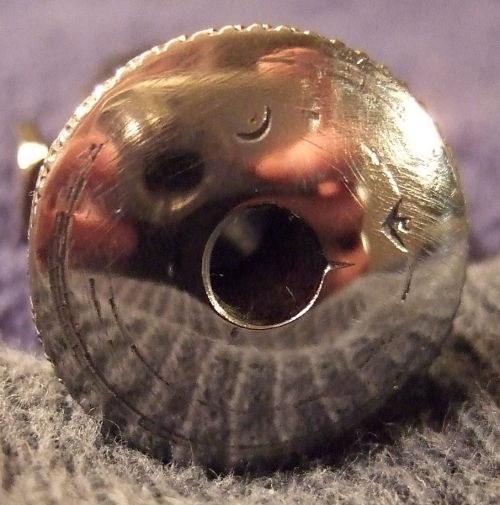
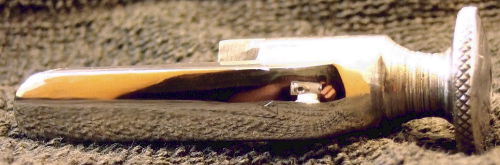
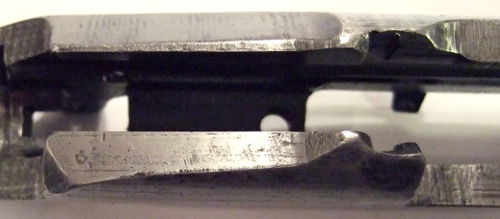
The Bolt
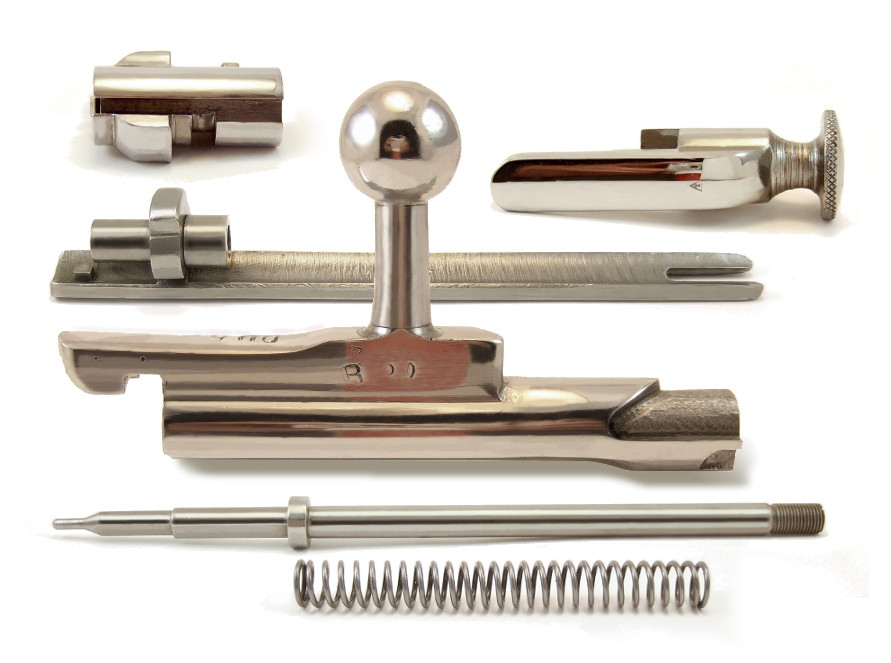
Bolt Caput, Cocking Knob, Guide Rod, Bolt Body, Firing Pin, Firing Pin Spring
Overview
There's two reasons to sand / smoothen the bolt; form and office. Parts of the bolt tin can be polished to a beautiful mirror cease. Other parts tin be sanded shine to improve the functioning of the bolt.
According to tnekkc, polishing the contact areas in the bolt and trigger will not significantly reduce the required trigger pull force. Polishing may polish the trigger pull, but his studies show that the sear spring is the simply significant gene affecting the trigger pull.
Fairly crude surface. First with 400 - 600 dust.
Alarm
Before you start sanding, information technology's important not to sand any surface that's critical to the proper and safe functioning of the rifle. Don't mess with the bolt face, the stop of the firing pin or the extractor. Don't sand the spring (unless you want to reduce it's strength). Don't change the shape or size of anything. Don't circular off the edges (unless they're actually precipitous).
Good, but needs more work. Showtime with 800 - 1000 grit.
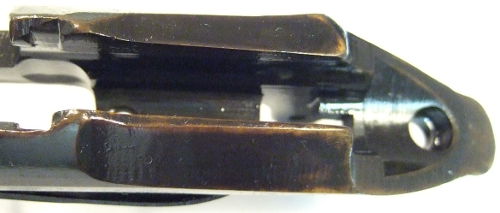
Bolt Disassembly
The bolt disassembly process isn't very difficult, but there are several good video tutorials on the internet that can explain information technology better than the following directions...
- Make sure the burglarize isn't loaded.
- Hold the trigger back and slide the bolt back and out of the receiver (if you haven't already).
- Pull back on the cocking piece and rotate it 90 degrees (1/4 plow). Information technology but turns one way.
- The bolt head and the guide rod/connector will come off.
Y'all have two methods to complete the commodities disassembly:
Option 1:
- Hold the bolt torso vertically with the cease of the firing pivot on a sturdy surface.
- Button and hold the bolt trunk down.
- Unscrew the cocking knob.
- Pull the remaining pieces autonomously.
Choice two:
- Use the multi-tool accessory that comes with the rifle or the guide rod/connector to unscrew the firing pivot from the cocking knob.
- Pull the remaining pieces apart.
Sanding To Improve Role
There are many things that tin can cause the commodities to be stiff, usually it's hardened cosmoline or a burr in the sleeping accommodation. Sanding the bolt cam surfaces smooth will probably not brand a significant divergence - unless the surfaces are very crude. If yous still desire to improve the operation of the bolt by sanding and polishing, just wait for the places on the commodities and receiver that rub together and make sure they're smooth. Don't sand too much and only use 1000 grit sandpaper or higher on these areas. The surfaces do non demand to be perfectly smooth.
Every bit an alternative to sanding and polishing, some people put polishing compound on the cam surfaces and open/shut the bolt one thousand times, merely using a Dremel with a polishing bike produces the same results in about x seconds.
Near a mirror finish. Start with 2000 grit and polishing compound.
Polishing To Amend Appearance
Polishing is a process that can crave quite a bit of time and patience. I use 400 to 2000 grit wet/dry sandpaper and a Dremel with polishing compound.
Beginning, evaluate the surface. If the scratches, auto marks, pitting, etc. are deep, then start with 400 to 800 grit sandpaper. If the surface is in fairly adept condition, beginning with virtually 1000 grit sandpaper. Sand with oil to prevent the sandpaper from loading up (accumulating a thick layer of metal dust on the surface of the sandpaper). Utilize low-cal pressure until all the existing scratches are gone and the surface has an even finish. Move up to a effectively grit and repeat. Generally, you should double the grit when you move up. After 1500 to 2000 grit sandpaper, move to the Dremel and polishing compound. If scratches persist, drop back to the sandpaper so re-polish.
A mirror finish.
If you program to use your Mosin from a concealed position, you probably won't want to shine the bolt and create a cogitating surface. In this case you tin can create a dainty, non-reflective cease by finishing the surfaces with 600 to 1000 grit wet/dry sandpaper or a light-green kitchen scrubbing pad.
For more polishing information, refer to my revolver polishing guide.
The Stock
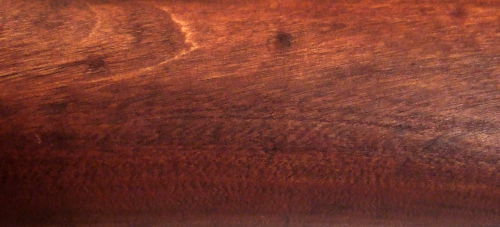
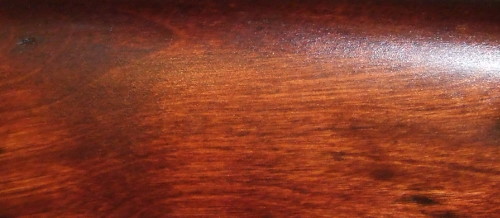
The stock seemed to exist in average condition. I decided to completely strip the stock, stain information technology and finish with polyurethane. Of course, there are many other means to refinish a Mosin stick, but this method seems to be very like shooting fish in a barrel and produce good results. I didn't remove the barrel band springs, cross bolt / recoil commodities or sling escutcheons. I only stained and polyurethaned right over them.
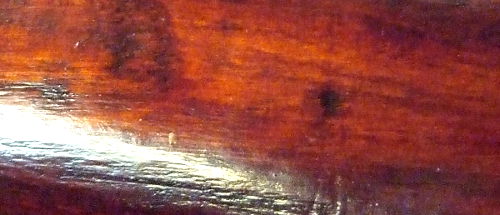
Original status.
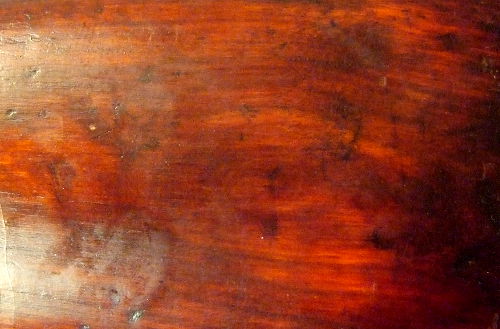
Original condition (alternating view).
Stripping
The stock was covered with a thick layer of onetime shellac. Shellac can be repaired fairly easily, simply I wanted a tougher terminate. I started with 90% rubbing booze and greenish scrubbing pads. Information technology was removing the shellac, but later 20 minutes of scrubbing there was still quite a bit of shellac remaining. I ran to the hardware store and found some Zinsser Article of furniture Refinisher. The can says it "Gently dissolves old finishes - preserves woods original colour and graphic symbol." It worked x times faster than rubbing alcohol and did non harm the wood, but the fumes were terrible! According to the MSDS it contains acetone, methanol and toluene. If you lot use any of these solvents, I strongly recommend wearing gloves and stripping the stock outside.
Afterward stripping the shellac and de-greasing.
The wood was oily after stripping off the shellac. I suspect the cosmoline had saturated deep into the woods. I sprayed it down with some commercial de-greaser, let it soak for a minute then rinsed with rubbing alcohol. I repeatedly de-greased and rinsed a few times. That seemed to remove well-nigh of the cosmoline without harming the wood. Yous tin can also let the stock sit in the hot sun and wipe off the cosmoline as it seeps out every half an 60 minutes. This method may accept several days.
Only now the forest seemed too nighttime and muddy. I mixed some OxiClean with h2o (it wouldn't dissolve in rubbing alcohol) and poured information technology on the stock. Afterward letting information technology sit for 20 minutes I rinsed it off. Later on repeating a couple times the woods seemed to lighten a bit, but information technology didn't look like new, unfinished woods. Possibly adjacent time I'll try some liquid bleach.

Afterwards bleaching with OxiClean.
This is the time to repair any dents in the stock. They tin can be steamed out with a wet textile and an atomic number 26. The procedure causes the wood fibers to bang-up up, hopefully returning to their original shape and resulting in a smooth surface. Kickoff, utilize some water to the dent and permit it soak in for a while. Employ more h2o until the paring is saturated. Adjacent, wet a cloth or towel. Lay it on the dent and employ a hot dress iron to steam the wood. Hopefully the dent will smooth out. You lot might take to steam it several times. Gouges can be filled with wood filler.
Information technology's usually easier to attain a smooth, gloss finish if you fill up the pores. Mosin stocks are usually fabricated of birch, which has adequately pocket-size pores. Filling the pores probably won't practise much good. I never carp with it, but if you want to invest some time doing information technology at present, you might salve a little time later sanding the finish smooth.
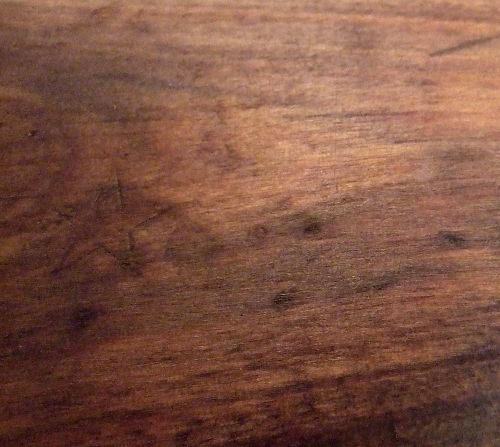
Staining
After letting the stock dry completely I sanded with 320 grit to knock downwards the grain that was raised with the OxiClean bleaching. I cleaned off the sanding grit, hung information technology and practical a thick coat of Varathane lite cherry stain. I waited about 5 minutes and hit it again. After virtually fifteen minutes I wiped off the excess. The woods didn't seem to blot much stain. The new color came out very close to the original colour (earlier any work was started on the stock).
Afterward staining.
Finishing
I decided to finish with polyurethane. Some people may experience that shellac is more than appropriate for a Mosin, but polyurethane is easier to apply and much more resistant to solvents, h2o, abrasion and pretty much everything else. Yous can apply a sealer to hold in the cosmoline, but it doesn't seem to be necessary. Update... It's been 3 years and the polyurethane looks fine (no separation, peeling, cosmoline seeping or anything).
You'll need to choose between a gloss or satin finish. I recommend a satin cease considering I call up it merely suites the graphic symbol of the rifle better and a gloss finish will highlight every dent and gouge in the stock. You can e'er change your listen and put a gloss cease over a satin finish later. You can also utilize a gloss finish and buff information technology to a nice satin finish with 0000 steel wool or a 3M brand synthetic steel wool pad.
I generally apply a very thin coat of wipe-on polyurethane on every surface, within and out. This seals the wood to protect from h2o, oil, etc. I apply the poly using a newspaper towel folded to about 1" x 3". Old t-shirts and socks too work really well.
Dying and staining both color the wood, but dye will let more of the grain to prove through. My stock didn't have much grain, and so dying wouldn't be much meliorate than staining. If you determine to dye the forest, I recommend Rit cloth dye. In that location are more expensive dyes made specifically for wood that can produce better results, but cloth dye is inexpensive and easily available. For a Mosin, I'd recommend mixing l% cherry-red and 50% brown dye. If possible, test it in an inconspicuous place on the stock. I mix the dye with virtually equal parts distiller water in an one-time glass jar. Because the dye is water based, it will raise the grain. It requires an extra sanding stride to remove the raised grain, merely the result is slightly smoother than if the grain had not been raised and sanded downwards.
Applying wipe-on poly is nigh foolproof, just at that place's a couple things that can mess it upward. The temperature should be higher up 60 degrees F, otherwise the poly volition accept several days to dry (during which time it will collect a lot of dust). If temperatures get above 90 or the humidity falls under about xxx% then the poly can dry out and then fast that information technology becomes difficult to apply. The poly needs to dry in an area that does non take dust or drafts. Any grit that lands on the poly earlier it'southward dry out will go embedded - and that makes information technology hard to get a squeamish, smooth cease. The poly is going to smell a little funny for a few days equally it dries.
You should follow the directions for whatsoever stop you use. Here's my general finishing process. I know it looks like a lot of steps, simply each step is easy and the results are most guaranteed to be beautiful...
- Sand out gouges, saw marks, etc. using 100 to 180 dust.
- Sand with 220 to 320 grit until nice and shine.
- Make clean off the sanding dust (use a vacuum, compressed air, clammy rag, tack cloth, or whatever works for you).
- Wet the surface with either of the following (I prefer to wipe on with a rag, t-shirt, etc)...
- H2o
- Water based dye
- Allow surface to dry out.
- Gently sand the grain down with 220 or 320 dust.
- Clean off the sanding grit.
- (Optional footstep) Apply stain (usually wipe on, await v minutes, wipe off). Let the stain to dry out.
- Apply a sparse coat of wipe-on polyurethane.
- Allow the poly to dry (ordinarily at least 12 hours).
- Sand with 1000 - 1500 grit wet/dry sandpaper. You can as well use a chocolate-brown paper bag, but it tin can get out lint in the finish. This will smoothen the finish and remove the inevitable dust nibs.
- Make clean off the sanding dust (a clammy rag works best at this stage).
- Continue the previous few steps of applying poly and gently sanding until you achieve the desired finish. Don't sand the final layer of poly.
It'll mostly accept at to the lowest degree 2 coats, usually 3 or four, rarely more. This should effect in a very smooth and beautiful finish.
Completed semi-gloss cease.
Alternative Finishing Methods
Watco danish oil can create a fairly good terminate. It'southward very easy to apply, just wipe on, let it sit for about 10 minutes and wipe off the excess. A couple coats is all you need and it results in a natural looking finish. Unfortunately, it only provides minimal protection.
The shellac finish can be restored. Sometimes all you lot need to do is clean the cease. If cleaning isn't enough then you tin wipe down the surface with alcohol to partially deliquesce information technology and shine it to a nice, new condition. If that doesn't work yous tin can use a new layer of shellac. I won't become into the details of how to do all of that because it could plough into it's own guide. There'south some good instructions on the internet.
You can apply many other finishes, but keep in mind the stock will likely become moisture from washing out the butt or maybe rain, it'll be exposed to various cleaning solvents and it'll probably get a little crush up through normal apply - so cull your finish appropriately.
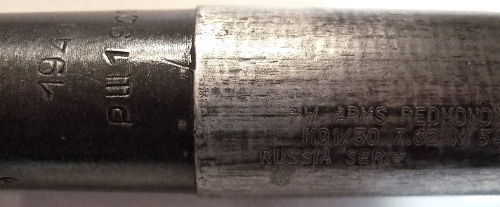
Bluing
I don't think it'south possible to achieve smashing results at home. I've tried several times and the best I can manage is a good result - simply definitely non professional quality. Perhaps it's only me. Of course you tin send information technology off to a pro - only that'll probably cost every bit much equally the Mosin. If your Mosin has a decent end on information technology, I'd recommend leaving it alone. It's probably not worth the hassle.
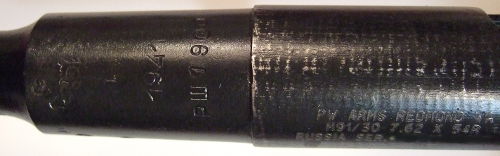
Original status.
Surface Preparation
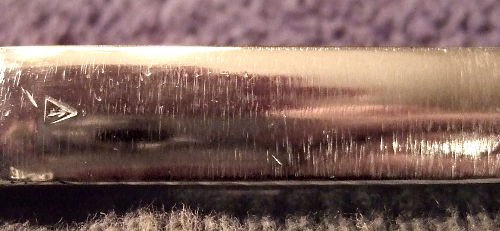
You'll need to sand off the old finish and smooth the surface. Don't sand too much on any surfaces that contact the commodities or stock, or will bear on the operation of the rifle. Start with a Dremel and a "rubber polishing bespeak" to smoothen out any rough spots. Next, use 400 - 600 grit wet/dry sandpaper and oil. Sand until the entire surface is make clean and smooth. The surfaces on my Mosin were then full of automobile marks and dents that they were impossible to completely sand out. Switch to grand grit wet/dry sandpaper and oil. If you desire a nicer terminate you can move onto 1500 - 2000 grit moisture/dry out sandpaper and oil. If you want an fifty-fifty nicer cease you tin can utilise the Dremel polishing cycle with polishing chemical compound.
Original condition (left) and later on sanding (correct).
Machine marks remain after a lot of sanding.
Helpful Tips
I won't cover my bluing process because the bluing you utilise may crave a different procedure, but I'll offer some helpful tips.
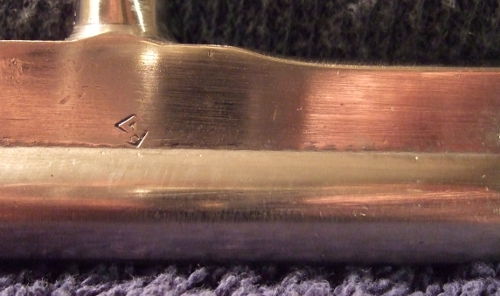
First, piece of work as fast as possible. The get-go step is to strip all the oil off the metal and rinse with water. The metal will begin to rust immediately. The faster you piece of work, the less rust y'all'll have. Because time is a factor, yous may want to merely blue half the rifle at a fourth dimension. Make sure the metal is absolutely make clean before applying the bluing. Article of clothing gloves to forestall fingerprints in the finish. Rinse the metal with very hot water. Bluing seems to work better on hot metal. If you've never blued, practice the entire procedure on a small slice first. A barrel band or the butt plate makes good exam subjects. You'll probably accept to repeat the bluing and rinsing process a few times to get a nice, dark bluish finish. Soak the metal in oil as soon as you terminate the bluing process.
Subsequently bluing.
Lack of bluing effectually the edges.
Alternative Methods
You can pigment your Mosin. Any practiced quality spray pigment that's recommended for metal should work fine. Strip all the oil out of the metallic. Rubbing alcohol is probably the easiest and cheapest way. Utilise tape to mask anything you don't want to pigment (like inside the bedroom and butt), and spray on a thin coat, let dry and repeat several times.

Source: https://www.kevinsworkbench.com/mosin/
Posted by: houghfroopped81.blogspot.com
0 Response to "How To Clean A Mosin Nagant M44"
Post a Comment